Album Proofing PJ Designed
Album Proofing (Photojunction Designed)
Communications between you and your client are much easier with Workspace Album Proofing. It's a transparent and intuitive way for your clients to communicate their requests for changes and, when they're ready, to approve the design so you can place their album order.
Sending design to your client for proofing
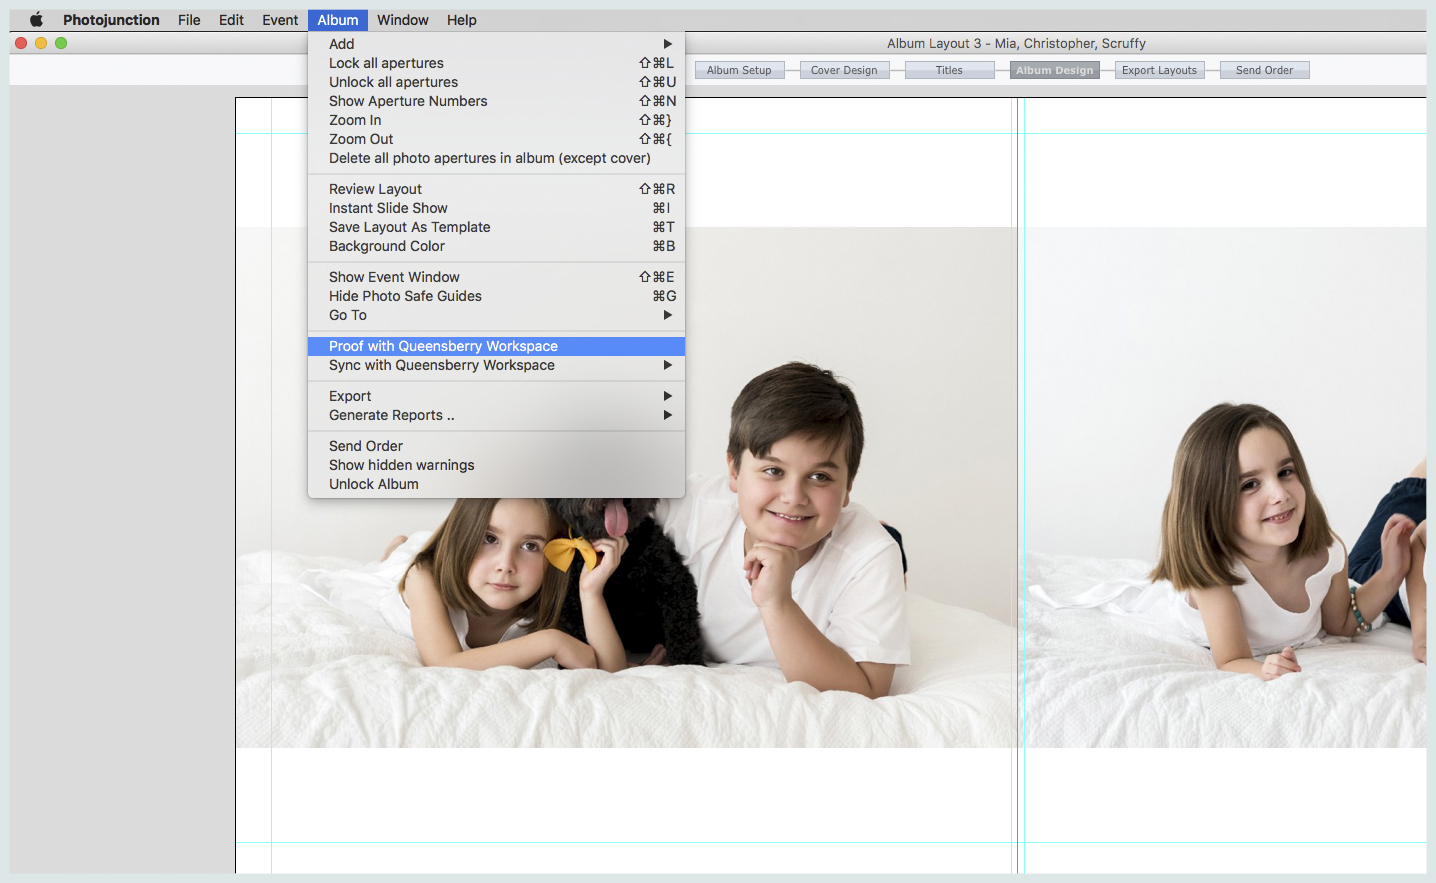
When you’ve finished the initial draft of your client’s album in PJ it’s time to send the album design off for proofing. All you have to do is select ‘proof with Queensberry Workspace’ under the Album menu in Photojunction.
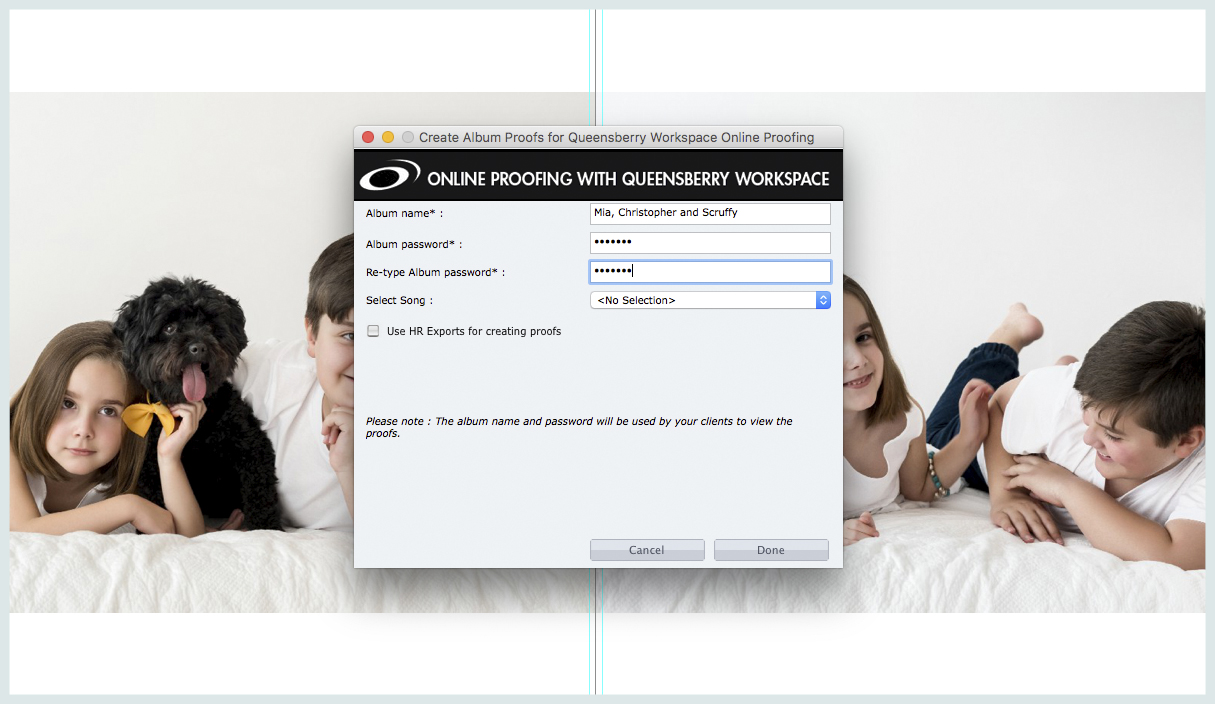
You will be taken through the set up of Album Proofing. Enter the album details and select Done. PJ will upload the proofing images to Workspace. You will then need to login and send the proofing images to your client.
Once in the Album (in Workspace), click "send design to client." If you've already set-up an album proofing template (under sell >> templates), the email you've set up will appear here. You can edit the styling of the email here or change the text to send to your client. Otherwise Workspace will generate the email text for you.
Note: You must click "send" once you are in the HTML editor to make the online proofing live. If you wish to add the link into your own personal emails, send the Album Proofing email to yourself (to make the page go live) and copy the link from there. Also please be careful not to edit the URL and PASSWORD when you’re editing the text in the email itself!
Once my client receives their draft what do they do?
Your client will receive an email advising that their album is ready for review. This will include a link and password. They’ll need to follow the link and enter the password to view the design.
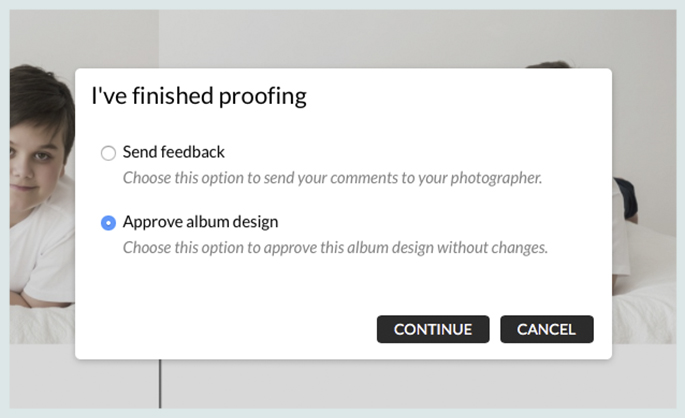
Your client can click anywhere on a layout to make a comment/ request edit to the design. Once your client has finished, they will need to select "I've finished with my album" and then "Send comments to Photographer.”
If your client has difficulties, send them this help link: https://help.queensberry.com/client-album-proofing
Making edits to your album
You will be notified when your client has submitted feedback. Open the link given to you in the email, or go straight to the Albums area in Workspace. View the comments in Workspace and make the changes in Photojunction. You can click ‘completed’ on the comment, once the change has been made or if you have queries, reply to the comment.
Resend the design to Workspace by going into Album menu in Photojunction. Select "proof with Queensberry Workspace" to send revision two. Click sync and the new design will replace the old design. Go back into workspace and open the album then click "send album to client."
Repeat this process until your client approves their album.
Approving the album design
Your client will need to approve the design. When they approve the design they will need to click "I've finished with my album," then "Approve". Once you have been notified that your client has approved the design, place your order and let Queensberry take care of the rest.