To sell prints and other products directly from your website, you will need to set up your price list. The simplest way to add products is to create packages, even for an individual product (so they display under the same product type and are easy for your client to purchase)
Price List Setup
1. Click SELL in the main navigation
2. Select Price Lists from the dropdown menu.
3. Click the Create New Price List button.
loading...
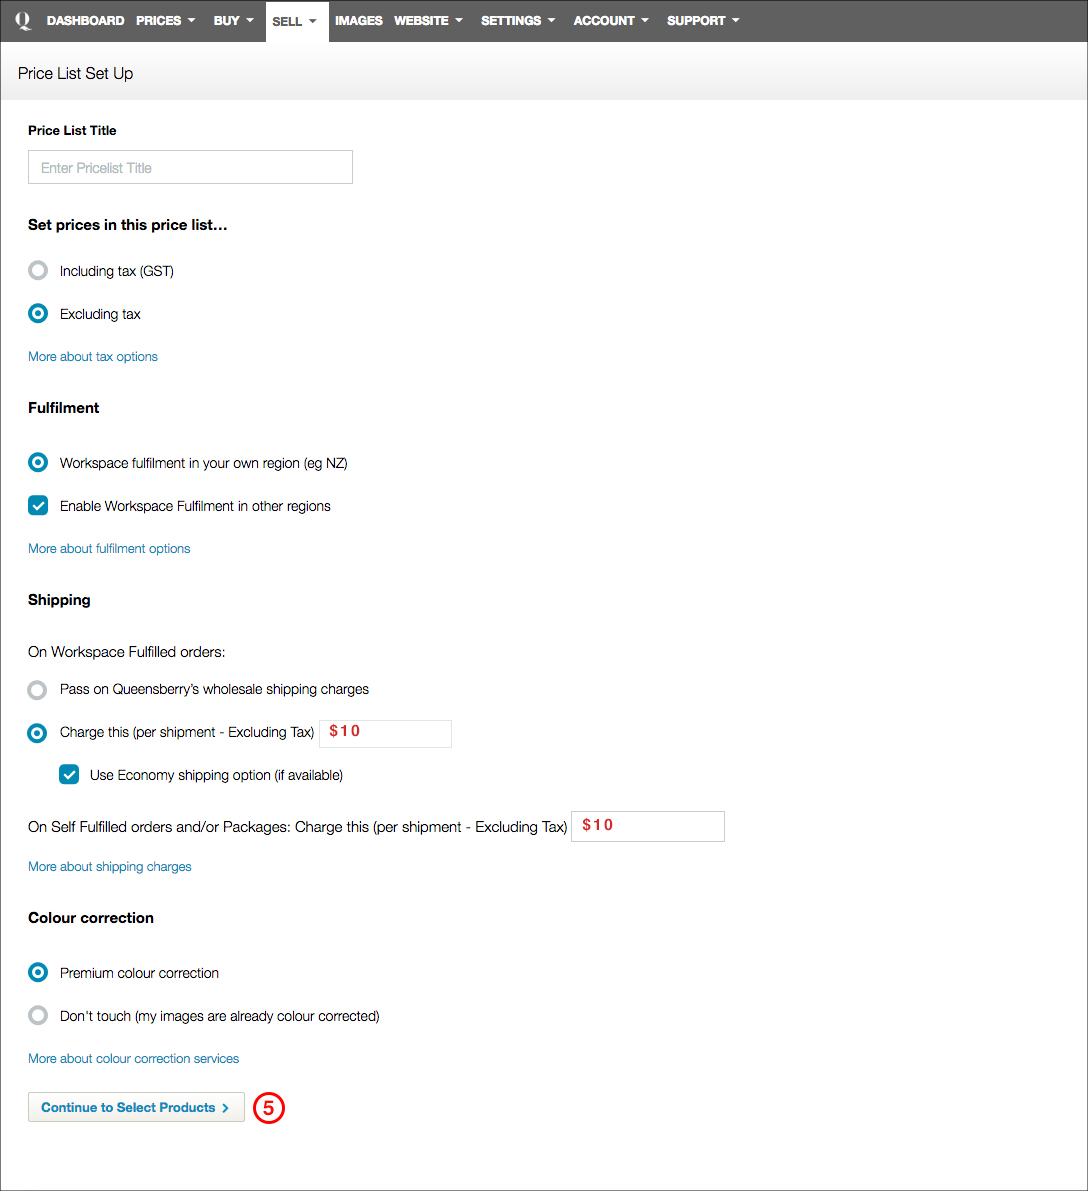
4. Choose the settings for your price list.
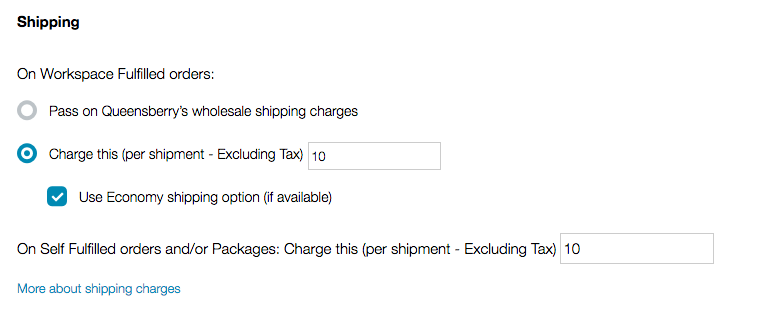
IMPORTANT: In the shipping section, the charge per shipment and self-fulfilled package shipment section needs to be filled out or we take the balance from what you charge your client. Here is where you enter the price you want to charge your client for individual delivery. eg. $10.
5. Click the Continue to Set Prices button
loading...
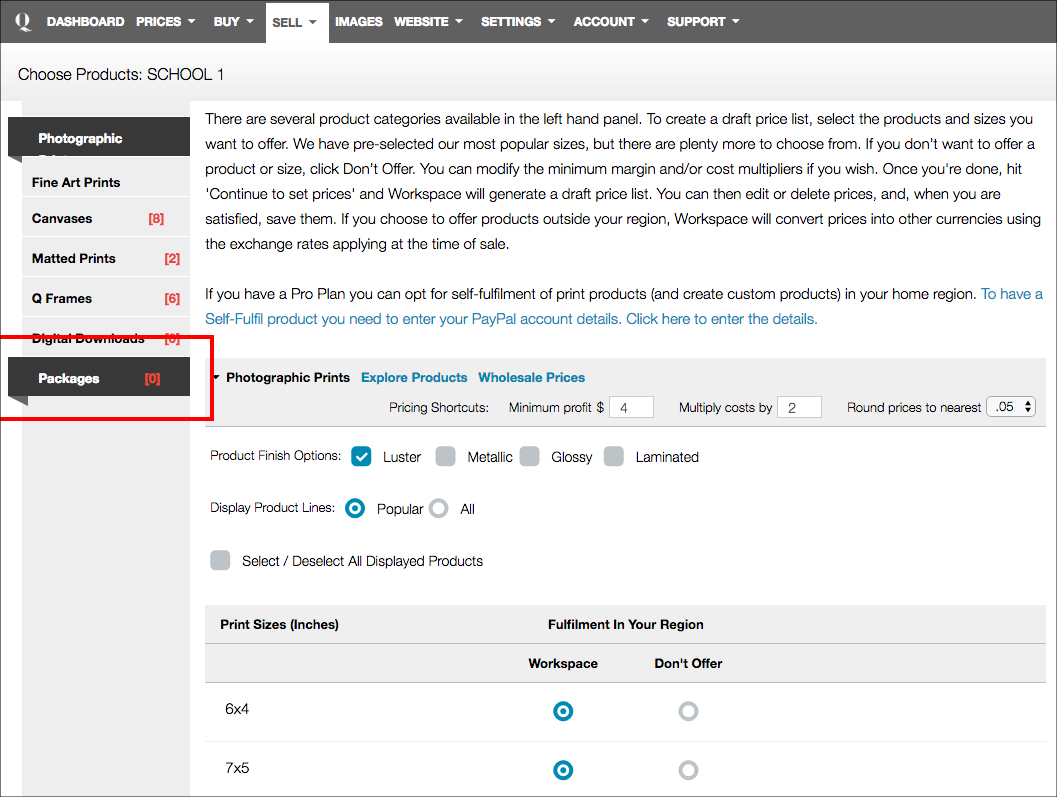
6. Select Packages from the menu. If you have not created any packages, follow the prompts to go to the packages area and create your first package.
The video tutorial below shows you how to create packages and add them to your price lists.
loading...
Setting up packages
The easiest way to set up your price list and allow your clients to purchase, is to create packages. Watch the tutorial below to see how to create packages and add them to your price list.
Important: In the shipping section, the charge per shipment and self-fulfilled package shipment section needs to be filled out or we take the balance from what you charge your client. Here is where you enter the price you want to charge your client for individual delivery.
See example below:
loading...
Test it: Once you have set up your price list, it is wise to test it on your website, making sure that the correct packages and prices are showing.
Login to a shopping cart using information from your CSV, and click BUY. Here you see what your client will see, the gallery and the products that are available for them to purchase.
Want inspiration?
For the "less-techy" articles, check our blog for product inspiration, photography celebration and more of the things we love.
Our job at Queensberry is to make your life as a photographer easier. Take a look at our services. From colour correction to digital art and album design, we’re here to help. We can even help set up your website.
We're a friendly bunch, here to look after your interests and sort out your problems — and we're looking forward to getting to know you. Email us: info@queensberry.com or call us on our free phones.