Slip-in Mats
Slip-in Mats
Slip-in mats are perfect for reveal walls. To order in bulk, so you can assemble them with prints in-studio, they come in packs of 20. Take a look at why you might offer slip-in mats, how to set up your files correctly, and how to order the prints in Workspace.
About Slip-in Mats
Slip-in mats are available to order in bulk and with Studio Box orders. Slip-in Mats allow you to insert and remove prints, great for in-person sales. Any matted prints not purchased can have the prints removed, and the mats can be stored away carefully for your next reveal. The mats open on one of the shorter sides, where you can slide the print into the mat.

To order in bulk, so you can assemble them with prints in-studio, they come in packs of 20. You’ll be able to select which print aperture you want at checkout. There's a price break for orders of six or more packs. Follow these links for pricing or to place a bulk order.
Queensberry Designers Alex and Melissa talk about why you'd use Slip-in Mats and some important things to consider when setting up print files.
Below you can see a simple visual, showing you how you would slip a print into a mat. You may want to wear gloves in order to keep finger prints and potential damage to a minimum.

Slide print into mat opening ...

... pull print down gently into the mat ...

... lift the mat gently, print slides beneath.
10x8 mat (interior measurement 9x6)
Available aperture sizes:
6x4 (145mm x 95mm)
5x5 (120mm x 120mm)
7x5 (170mm x 120mm)
7.5x5 (183mm x 120mm)
8x6 (195mm x 145mm)
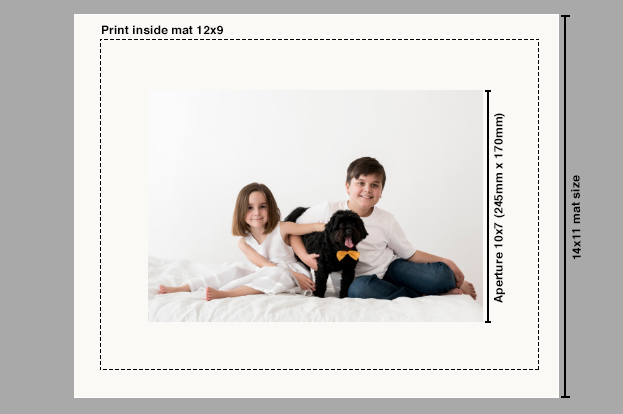
14x11 mat (interior measurement 12x9)
Available aperture sizes:
8x6 (195mm x 145mm)
8x8 (195mm x 195mm)
9x6 (220mm x 145mm)
10x7 (245mm x 170mm)
10x8 (245mm x 195mm)
12x8 (295mm x 195mm)

White border added to print.
It's important to size the prints so they fit snugly inside the mat, rather than to suit the opening in the mat. The image is sized to suit the aperture or opening, but the paper print is extended by the unprinted white border to fit the mat.
The easiest way to do this is in Photoshop. In the example below, it shows you how to set up a print template for a 10x8 mat. The template is 9x6 (the interior measurement of the mat) and the image placed on the template matches the size of the aperture you have chosen for your mats (in this case 7x5), plus 2.5mm to ensure the image sits behind the mat.
Follow this simple tutorial below for adding a white border to a print for a 10x8 mat, with a 7x5 aperture.

9x6 template for 10x8 mat, 250ppi, Adobe RGB (1998).
1. Create a new document in Photoshop. FILE>NEW.
2. Set the dimensions to 9x6 (for a 10x8 mat) or 12x9 (for a 14x11 mat), which are the interior measurements of the mat. The example is a 9x6 print setup for a 10x8 mat.
3. Make sure the resolution is set to 250ppi and the colour profile is Adobe RGB 1998.

Resize image to aperture size, then add 2.5mm to each side.
5. Open the image you want to place on the template.
6. Command+I (Ctrl+I for PC) to see the image dimensions. Change these to the aperture size of your mat, and add 2.5 mm to each side (increasing the one of the measurements 5mm does this when proportions are constrained). The image needs to be slightly bigger than the aperture so it sits completely behind the mat. Make sure the resolution and colour space are the same as your template.
7. Copy and paste the image onto the template, it should drop directly into the centre. You can check this by dragging the image a bit, and guides should appear when it is perfectly centred.

Guides show image centred on 9x6 white border template.
8. Save the file. You now have a print perfectly set up for a slip-in mat! Repeat until you have added a border to all of your print files.
How to Order Slip-in Mats
Follow this link to be taken to the bulk ordering page where you will be taken through the order process step-by-step.
You can also request to have slip-in mats in your Studio and Premium Boxes.
How to Order Prints
You will need to order your prints through Workspace. Order these prints as either 9x6 or 12x9 depending on the mat size you've ordered. If you've ordered both slip-in mats and prints, you will need to allow for the production time of the mats for the whole order to be despatched.
PLEASE ADD A NOTE TO YOUR ORDER INDICATING THESE PRINTS ARE FOR SLIP IN MATS.


