Upload additional files
Upload additional files to Photojunction
On occasion you may need to send Queensberry new or edited files for an order. If you've ordered your album in Photojunction, you can follow the instructions below to send more files to us.
Uploading files
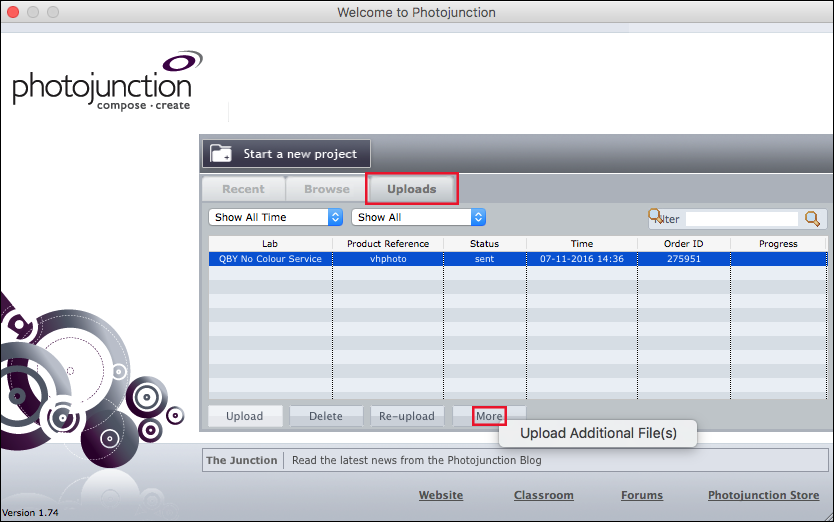
1. Start at the Photojunction Welcome screen.
2. Click the Uploads tab.
3. Select the original upload for this order, so it’s highlighted.


loading...


4. Click the “More” button and select 'Upload Additional File(s)'.
5. Photojunction will open up a new window to drag and drop your files into.
6. You will be asked to give a reason for your upload. This just helps us to understand why we are receiving new files, or what to do with them.
7. Once you have answered that PJ will create a new upload bundle under the original reference and send the files through to us.
If Photojunction cannot find the original bundle created when the order was first uploaded, it will request a location to create the new bundle in. All you need to do is create an empty folder on your desktop, then navigate Photojunction to it. Once you’ve done that PJ will open the drag and drop window and you can continue as explained above.
Important: If you originally uploaded your order using Workspace you’ll need to upload any additional files using Workspace. Otherwise there is no way to link the new files to the original order.


