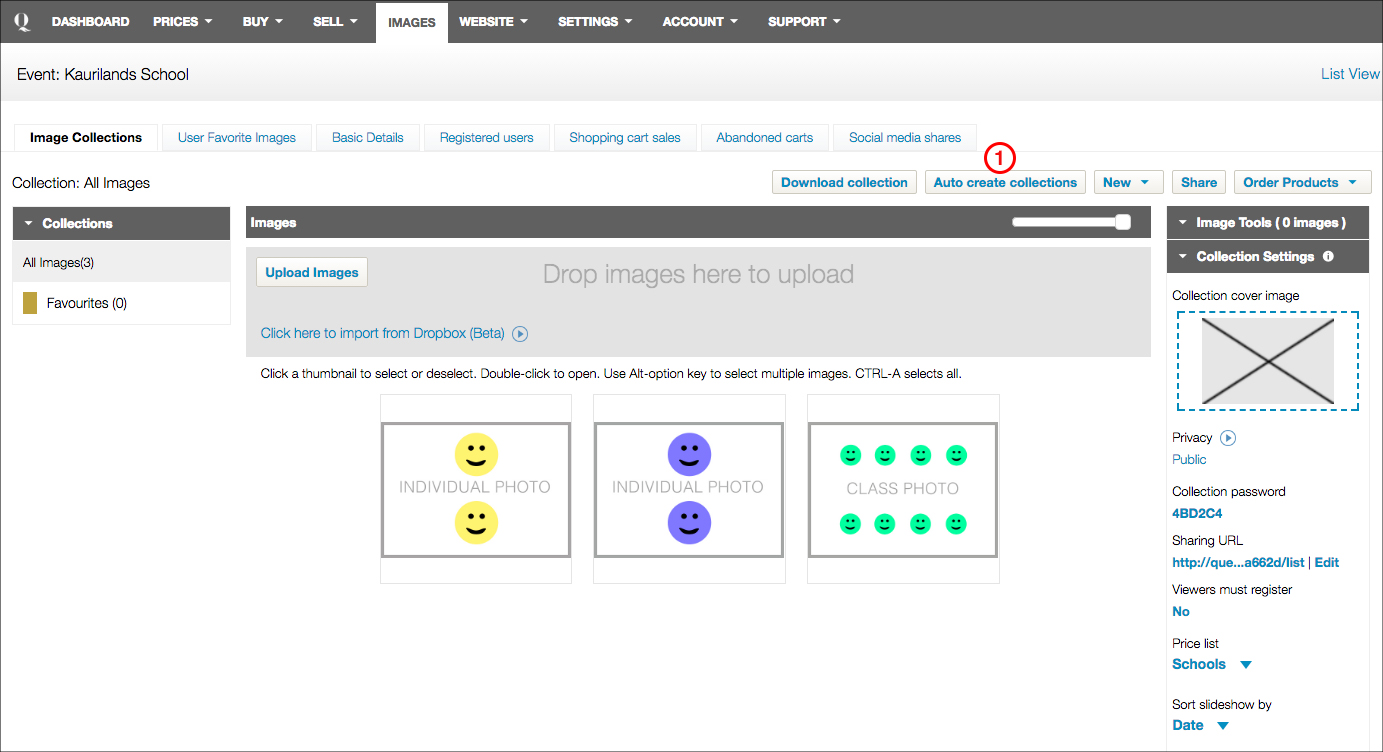
Go to the IMAGES tab in the main navigation, and select the event you wish to apply the CSV to. Here you can see the entire collection of images in your event, the collection is All Images.
1. Select the Auto Create Collections button.
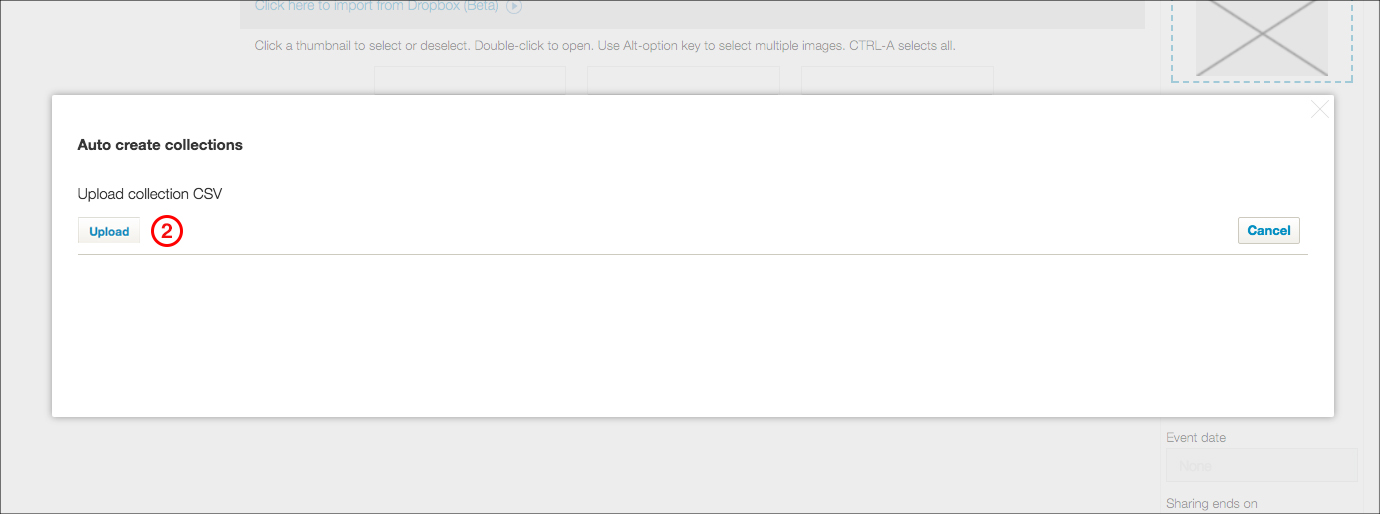
The Auto Create Collections button creates an individual password for each portrait session from the information on your CSV.
loading...
2. A dilogue box will appear. Click upload and select your CSV file.
loading...
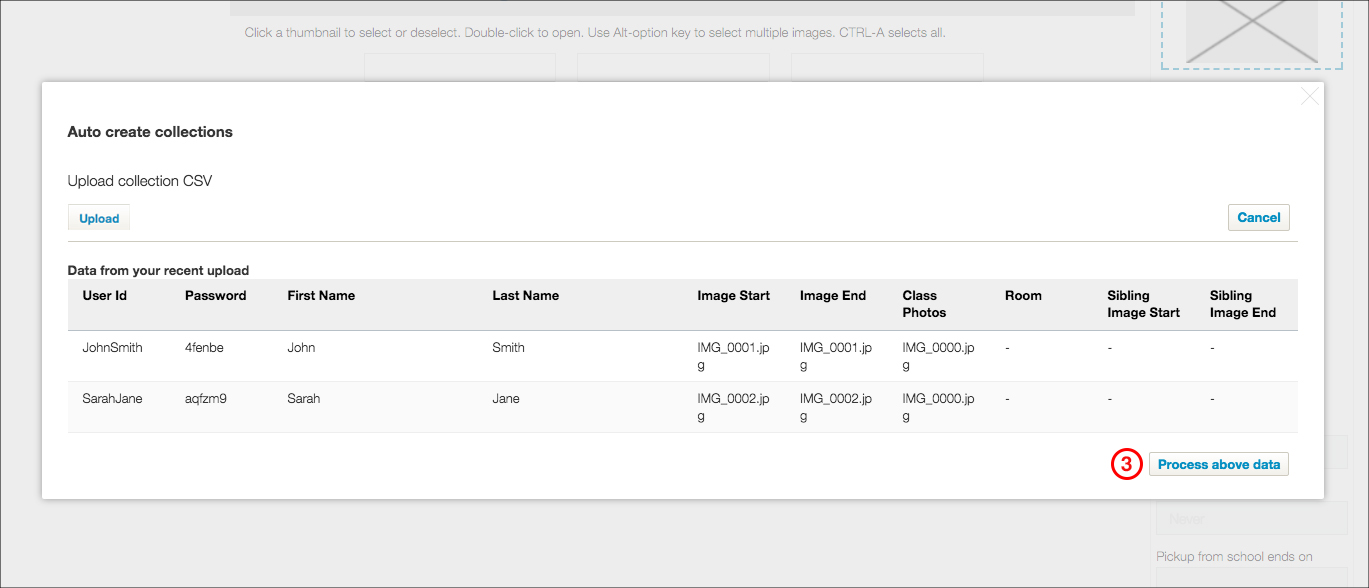
3. Once your CSV has uploaded*, click the Process above data button.
loading...
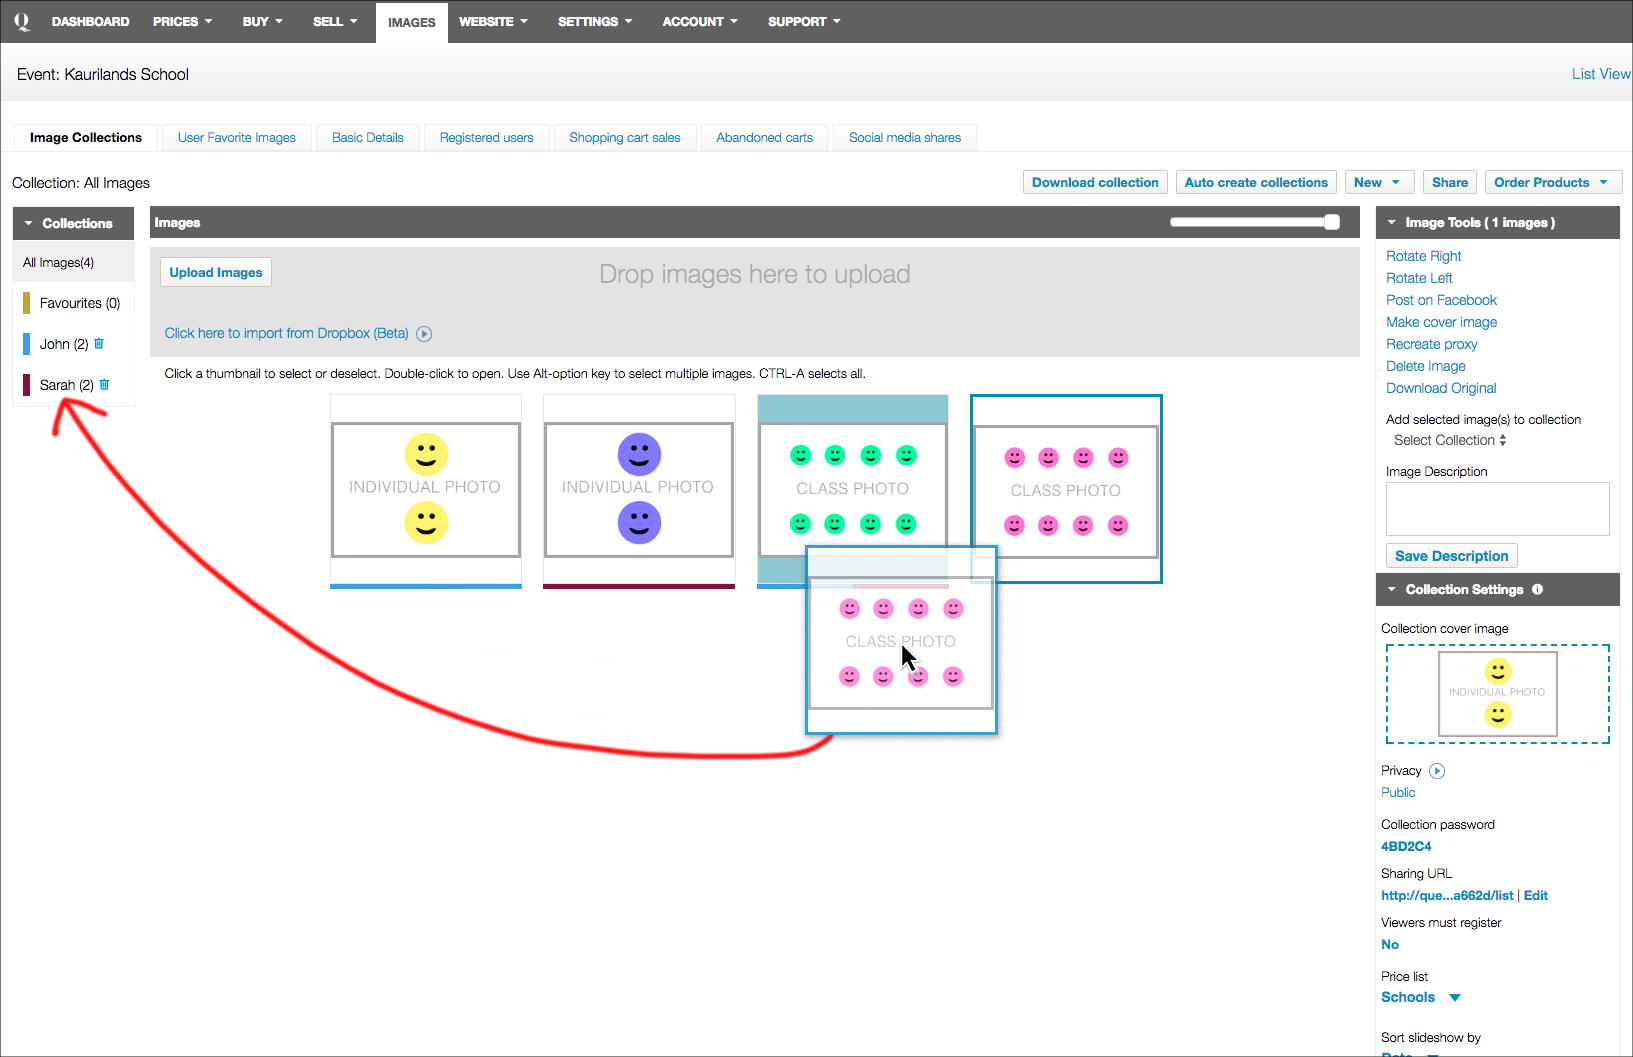
Collections have now auto-created.
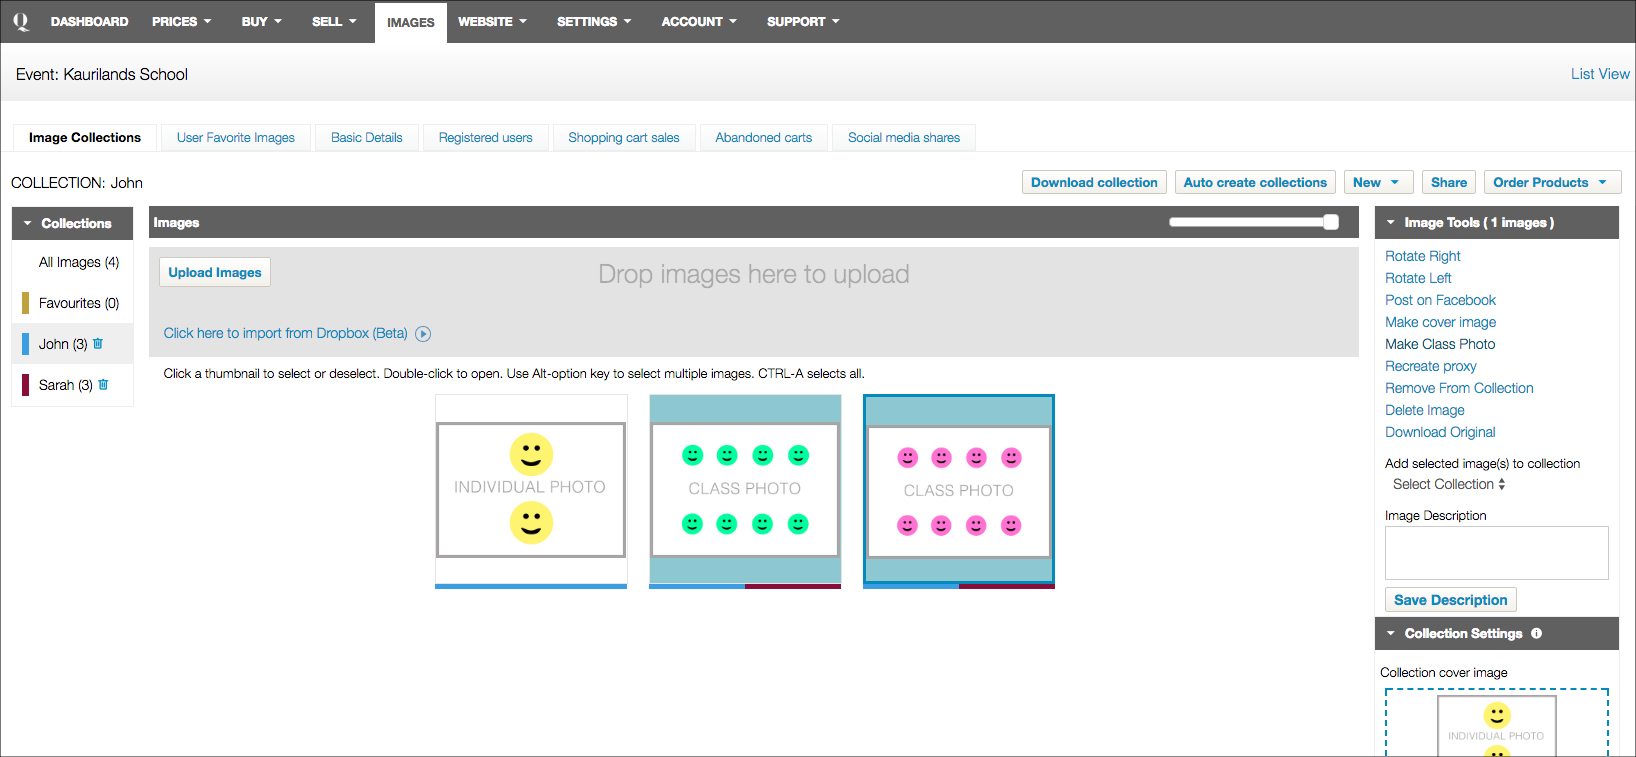
4. You can see the collections have been created with the first name of the student. The coloured line underneath the photograph corresponds to the swatch of colour next to the collection name.
5. The class photo should have a blue frame around it (pictured in the example), this removes the ability to download the file if you offer Digital Downloads.
My class photo doesn't have a blue frame
There may be a spelling mistake or incorrect file name in your CSV. To make the photo a class photo, follow the steps below.
1. Select the class photo you are wanting to add the blue frame to (signifying it is a class photo).
2. Drag it into each collection it is missing from (each child's collection if the collections are organised this way).
loading...
3. Select a collection from the menu on the left.
4. Click on the image tools dropdown menu (if it is not already expanded).
5. Select the 'Make image School Photo' option.
The photo should now have a blue frame, signifying that it is a class photo, and should not be available for download.
loading...
Want inspiration?
For the "less-techy" articles, check our blog for product inspiration, photography celebration and more of the things we love.
Our job at Queensberry is to make your life as a photographer easier. Take a look at our services. From colour correction to digital art and album design, we’re here to help. We can even help set up your website.
We're a friendly bunch, here to look after your interests and sort out your problems — and we're looking forward to getting to know you. Email us: info@queensberry.com or call us on our free phones.