Setting Your Custom Domain
Knowledgebase // Workspace // Domain Setup
Custom Domain Setup
When you set up your Workspace website, the default URL is studioname.queensberryworkspace.com, where "studioname" is normally the name of your studio. You may prefer to register your own URL and point incoming traffic to that address instead. That is certainly best practice and a perfectly standard procedure, and this article explains how to do it.
Setting a custom domain in Workspace
Step 1. Set up your default Workspace URL
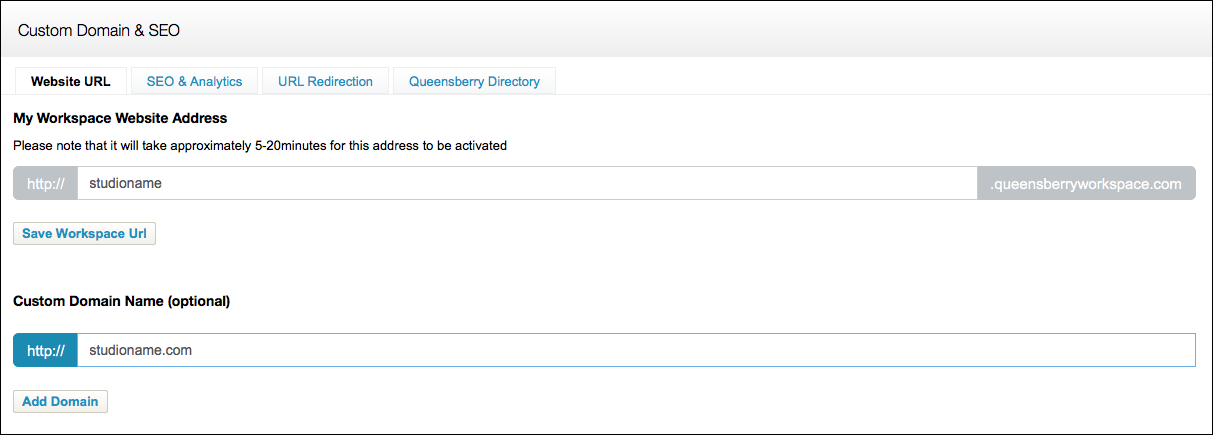
Go to SETTINGS in the main navigation, then select click "Custom Domain & SEO" in the drop down menu. On the custom domain & SEO page, you'll find two URL fields. If you haven't already, fill in the first (My Workspace Website Address). If your first choice is taken, you may need to choose another.
This address (eg studioname.queensberryworkspace.com) is your default Workspace URL and is required even if you intend to use and promote a different URL. Having done that, we'll explain how to "redirect" traffic to the default URL behind the scenes - ie. redirect traffic from mygallery.studioname.com (the custom URL that you own and promote, and that the visitor typed in or clicked on) to studioname.queensberryworkspace.com (what Workspace knows you as).
We'll use those URLs in the examples below.


loading...


Step 2. Register your domain
Domain name registration is not typically free; there is an initial cost which registers the domain name for a period of time, with ongoing renewal fees to keep the domain registered. You are responsible for those fees. To register a domain, contact an ICANN-accredited domain registrar such as GoDaddy.
Note: You can link multiple URLs to your Workspace account, eg studioname.com, www.studioname.com, studioname.co.uk, mygallery.studioname.com could all be linked. Just purchase and set up additional URLs in exactly the same way.
Step 3. Configure your DNS for custom Domain Name (CNAME)
In order to have your custom domain point to the Workspace servers, which will actually respond to your incoming traffic, you need to configure DNS (Domain Name Service), or in other words, add a Custom Domain Name (CNAME) record for the domain.
In our example, you will need to configure mygallery.studioname.com (your custom URL) as a CNAME to studioname.queensberryworkspace.com using the tools provided by your DNS provider. The CNAME will take anywhere between 1hr to 48hrs to become active (visible on the internet).
Note: Many domain registrars provide DNS services on a for-pay basis. Your DNS provider will supply documentation on how to use their service. For guidelines on setting up CNAME records on common hosting services, including GoDaddy, take a look here.
Step 4. Set up Workspace to respond to ("answer") your traffic
The queensberryworkspace.com servers will not properly route the traffic for your domain until you configure your project's custom domain name, as follows:
Assuming you're logged in to Workspace, go back to the Website URL page in Settings, as described above, find the Custom Domain Name field and enter the domain that you would like us to answer for (e.g. mygallery.studioname.com or www.studioname.com).
Important! If you ever decide to let your domain lapse, remember to update any links to it (to avoid the risk of someone else registering that domain and surprising your users when they try to access your Workspace website)!


